
Bike Manual Trainers: A Comprehensive Guide (Updated 03/05/2026)
Indoor cycling, utilizing smart bikes or trainers with Zwift, offers tailored training plans and benefits from patented technologies – sixteen patents exist!
What is a Bike Manual Trainer?
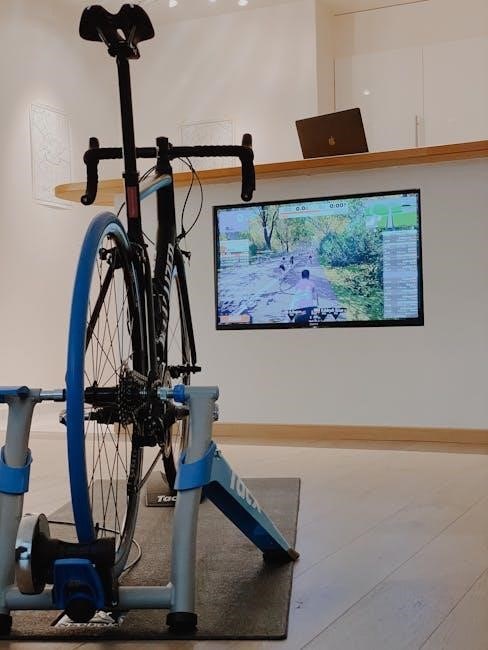
A bike manual trainer, also known as an indoor bike trainer, is a device that allows cyclists to ride and train indoors, replicating the experience of outdoor cycling. These trainers connect to your existing bicycle, effectively turning it into a stationary exercise machine. They’re invaluable for maintaining fitness during inclement weather or when outdoor riding isn’t feasible.
Modern trainers range from basic models offering simple resistance to sophisticated “smart” trainers that integrate with cycling software like Zwift, providing realistic simulations and detailed performance data. They cater to all levels, from casual riders to competitive athletes, offering a convenient and effective way to improve endurance, strength, and overall cycling proficiency. Proper use requires understanding bike compatibility and safe operation.
Types of Bike Manual Trainers
Bike manual trainers come in several distinct types, each offering a different riding experience and price point. Direct Drive Trainers replace your bike’s rear wheel and connect directly to the cassette, providing a very realistic feel. Wheel-On Trainers are more affordable, attaching to your bike via the rear wheel.

Resistance mechanisms also vary. Fluid Resistance Trainers use fluid to create resistance, simulating a natural road feel. Magnetic Resistance Trainers employ magnets, offering adjustable and consistent resistance levels. Many modern trainers boast smart capabilities, automatically adjusting resistance based on virtual routes or power targets. Choosing the right type depends on your budget, training goals, and desired level of realism.
Direct Drive Trainers
Direct Drive Trainers represent the pinnacle of indoor cycling realism. These units completely eliminate the rear wheel from the equation, directly clamping onto your bike’s cassette. This direct connection translates to incredibly accurate power measurement and a remarkably lifelike road feel, mimicking outdoor riding conditions with exceptional fidelity.
They are generally more expensive than wheel-on models but offer superior performance and durability. Many smart direct drive trainers automatically adjust resistance to simulate hills or group rides, integrating seamlessly with platforms like Zwift. They require minimal calibration and provide a quieter, smoother experience, making them ideal for serious cyclists.
Wheel-On Trainers
Wheel-On Trainers are a more budget-friendly entry point into indoor cycling. As the name suggests, these trainers require you to place your bike’s rear wheel onto a roller. They are compatible with most bikes, offering versatility, but typically don’t provide the same level of realism or accuracy as direct drive models.
Wheel-on trainers often use resistance units that simulate wind or magnetic fields. Calibration is frequently needed to ensure accurate power readings. While generally louder than direct drive trainers, they remain a popular choice for cyclists seeking an affordable and convenient way to train indoors, especially for basic fitness and maintenance riding.

Fluid Resistance Trainers
Fluid Resistance Trainers utilize a sealed fluid chamber to create resistance, mimicking the feel of riding on the road. As speed increases, the fluid thickens, providing a progressive resistance curve that feels natural and responsive. This type of trainer is known for its quiet operation, a significant advantage for those training indoors.
Fluid trainers generally require less maintenance than magnetic models. However, they can be susceptible to leaks over time. They offer a good balance between realism, affordability, and quietness, making them a popular choice for serious cyclists seeking a more immersive indoor training experience, and are a viable option for endurance workouts.
Magnetic Resistance Trainers
Magnetic Resistance Trainers employ magnets to create resistance against the bike’s flywheel. These trainers offer precise and consistent resistance levels, often adjustable via handlebar-mounted levers or, in smart trainer versions, through software connections like Zwift. They are generally quieter than older models but may not perfectly replicate the feel of outdoor riding.
Magnetic trainers are known for their durability and relatively low maintenance. They provide a reliable training platform for various workouts, from interval training to long endurance rides. The ability to accurately control resistance makes them ideal for structured training plans and achieving specific fitness goals, offering a versatile indoor cycling experience.
Setting Up Your Bike Manual Trainer
Ensure bike compatibility and proper frame size before securing the trainer; initial calibration is key for accurate data and a smooth, effective workout experience.
Bike Compatibility & Frame Size
Determining bike compatibility is the crucial first step. Most trainers accommodate a wide range of bicycle types, but verifying your frame’s suitability is essential. Road bikes, mountain bikes, and hybrids generally work well, however, some step-through frames may present challenges.
Frame size plays a significant role in trainer stability and performance. Trainers specify maximum wheel sizes and frame dimensions they can accommodate. Always check the trainer’s specifications against your bike’s measurements before purchase. Incorrect fit can lead to slippage, instability, or even damage to your bike or the trainer itself. Consider quick-release or thru-axle compatibility, as adapters may be necessary for certain setups.
Securing the Trainer to Your Bike
Properly securing your bike to the trainer is paramount for a safe and effective workout. Direct drive trainers typically require removing the rear wheel and attaching the bike’s cassette directly to the trainer’s freehub body. Wheel-on trainers clamp the rear wheel in place.
Ensure the quick-release lever or thru-axle is firmly tightened. Double-check the trainer’s clamping mechanism to guarantee a secure hold on the tire. Insufficient tightening can cause slippage during intense riding, potentially leading to falls or equipment damage. Regularly inspect the connection before each session, and consider using a torque wrench for precise tightening, especially with thru-axles.
Initial Calibration and Setup
Before your first ride, calibrate your bike trainer for accurate power readings and a realistic cycling experience. Many smart trainers require software-based calibration, often through apps like Zwift or TrainerRoad. Follow the manufacturer’s instructions carefully, as procedures vary between models.
For wheel-on trainers, ensure proper tire pressure and alignment. Some trainers need manual resistance adjustments. A ‘spin-down’ calibration, simulating outdoor riding, is often necessary. Resetting the console via battery removal can resolve initial setup issues. Confirm each pedal turn corresponds to the expected distance – typically 4 feet – for accurate data tracking.

Training with a Bike Manual Trainer
Indoor cycling boosts efficiency and aerobic fitness through interval, endurance, and hill simulation workouts, offering a safe alternative during inclement weather conditions.
Benefits of Indoor Cycling Training
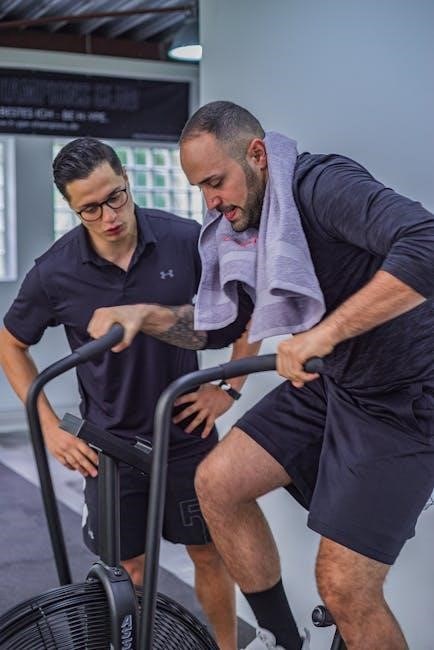
Indoor cycling with a bike manual trainer provides a remarkably effective and convenient way to maintain and improve your fitness. It allows for consistent training regardless of external weather conditions, eliminating disruptions caused by rain, snow, or extreme temperatures. This consistency is key to building endurance and achieving fitness goals.
Furthermore, indoor training offers a controlled environment, ideal for focused workouts and precise data tracking; You can easily monitor power output, cadence, and heart rate, enabling you to tailor your training plans for optimal results. It’s also a safer alternative to outdoor riding, minimizing risks associated with traffic and road hazards. Regular use can even improve blood circulation and combat the negative effects of a sedentary lifestyle, contributing to overall health and immunity.
Creating Effective Training Plans
Developing a structured training plan is crucial for maximizing the benefits of your bike manual trainer. Consider incorporating varied workouts to challenge your body and prevent plateaus. Interval training, with alternating high-intensity bursts and recovery periods, significantly improves efficiency and aerobic capacity.
Endurance workouts, sustained at a moderate intensity, build stamina and cardiovascular health. Don’t neglect hill simulation workouts, which strengthen leg muscles and enhance climbing ability. Remember to progressively increase the intensity and duration of your sessions. Utilizing platforms like Zwift can provide immersive experiences and guided training programs, ensuring a well-rounded and motivating indoor cycling routine.

Interval Training Workouts
Interval training on your bike manual trainer is a highly effective method for boosting fitness. These workouts alternate between short, intense bursts of effort and periods of active recovery. A sample workout could involve 30-second sprints at maximum resistance, followed by 60-second easy pedaling.
Repeat this cycle 10-15 times. Interval training improves both aerobic and anaerobic capacity, enhancing efficiency and power. Vary the interval durations and resistance levels to continually challenge your body. Remember proper warm-up and cool-down are essential. This type of training combines benefits, improving efficiency and aerobic fitness simultaneously.
Endurance Training Workouts
Endurance workouts on a bike manual trainer build cardiovascular fitness and stamina. These sessions involve sustained cycling at a moderate intensity for an extended period. Aim for a continuous ride lasting 60-90 minutes, maintaining a consistent cadence and resistance level that allows you to comfortably hold a conversation.
Gradually increase the duration or resistance over time to challenge yourself. Endurance training improves your body’s ability to utilize oxygen efficiently and delays fatigue. Ensure adequate hydration and nutrition during longer rides. Consistent endurance work prepares your body for longer distances and improved overall health.
Hill Simulation Workouts
Hill simulation workouts on a bike manual trainer effectively mimic outdoor climbing, building strength and power. These workouts involve alternating between periods of high resistance, simulating uphill climbs, and lower resistance for recovery. Begin with a warm-up, then increase resistance incrementally, holding each ‘climb’ for 2-5 minutes.
Focus on maintaining a consistent cadence, even as resistance increases. Recovery periods should allow your heart rate to decrease slightly. Hill simulations improve leg strength, cardiovascular endurance, and prepare you for challenging terrain. Remember proper form and controlled movements throughout the workout for optimal results and injury prevention.

Maintenance and Troubleshooting
Regular cleaning, lubrication, and component checks are vital for optimal performance; address slippage or resistance issues promptly, potentially needing part replacement.
Regular Cleaning and Lubrication
Consistent maintenance extends your bike manual trainer’s lifespan and ensures smooth operation. After each use, wipe down the frame with a damp cloth to remove sweat and dust, preventing corrosion. Pay close attention to the roller (for wheel-on trainers) and the cassette/freehub body on direct drive models, cleaning them thoroughly.
Lubricate the trainer’s moving parts – check the manufacturer’s instructions for specific recommendations – using a bicycle-specific lubricant. This minimizes friction and prevents wear. Cover the bike when not in use to shield it from sunlight and dust accumulation; Remember that proper care, like protecting from discoloration, contributes to long-term reliability and performance, ensuring a consistent training experience.

Common Issues and Solutions
Slippage between the trainer and tire (wheel-on models) is frequent; ensure proper tire pressure and trainer tension. For direct drive trainers, cassette issues can arise – verify secure attachment. Resistance problems often stem from calibration errors; recalibrate following the manufacturer’s guide. If the console isn’t functioning, try a battery reset, a simple troubleshooting step.
For mini-exercise bikes, instability can occur; ensure pedals are securely fastened. Remember, each pedal turn corresponds to a specific distance, so consistent operation is key. If issues persist, consult the manual or seek professional assistance. Prioritize safety and proper function for effective indoor training.
Slippage Issues
Slippage between your bike tire and the roller of a wheel-on trainer is a common frustration; The primary culprit is often insufficient tire pressure; inflate tires to the recommended PSI. Equally important is ensuring the trainer’s tension lever is firmly engaged, maximizing roller-to-tire contact. Regularly check for debris on both the tire and roller, as this reduces grip.
For persistent slippage, consider a dedicated trainer tire – these have a smoother surface optimized for indoor use. Avoid using heavily worn tires, as their reduced tread depth exacerbates the problem. Proper setup and maintenance are crucial for a secure and effective training experience, preventing frustrating interruptions.
Resistance Problems
Experiencing inconsistent or absent resistance on your bike trainer can stem from several sources. For magnetic trainers, verify the connection to a power source or ensure batteries aren’t depleted – a console reset might be necessary. Fluid resistance trainers rely on fluid levels; check for leaks or low fluid, potentially requiring a refill.
Calibration is key; follow the manufacturer’s instructions for accurate resistance readings. Ensure the trainer is properly connected to your cycling software (Zwift, etc.). If issues persist, inspect the resistance unit for obstructions or damage. Regular maintenance, including cleaning, can prevent resistance malfunctions and ensure optimal performance.
Trainer Component Replacement
Over time, bike trainer components may require replacement due to wear and tear. Common replacements include the roller (for wheel-on trainers), the fluid cartridge (for fluid trainers), or internal components of magnetic resistance units. Always consult the manufacturer’s documentation for specific part numbers and replacement procedures.
Prioritize genuine replacement parts to maintain trainer functionality and warranty validity. If you’re uncomfortable performing the replacement yourself, seek assistance from a qualified bike mechanic. Proper installation is crucial for safety and performance. Disposing of old components responsibly, following local regulations, is also important for environmental sustainability.

Safety Considerations
Always warm up and cool down properly, stay hydrated, and avoid overexertion while training; never operate a mini-bike while intoxicated!
Proper Warm-up and Cool-down
Prior to any indoor cycling session with your bike manual trainer, a thorough warm-up is crucial for preparing your muscles and cardiovascular system. Begin with five to ten minutes of easy pedaling at a low resistance, gradually increasing your cadence. Dynamic stretches, focusing on leg muscles, hips, and core, are also beneficial.
Following your workout, a cool-down period is equally important. Reduce your resistance and pedal at a slow pace for five to ten minutes. This helps to gradually lower your heart rate and prevent muscle soreness. Static stretches, holding each stretch for 20-30 seconds, should be incorporated to improve flexibility and aid in recovery. Remember, consistent warm-up and cool-down routines contribute significantly to injury prevention and overall training effectiveness.
Hydration and Nutrition During Training
Maintaining proper hydration and nutrition is paramount when utilizing a bike manual trainer, especially during longer or more intense sessions. Dehydration can significantly impair performance and increase the risk of cramping. Drink water consistently before, during, and after your workout. Consider electrolyte drinks for sessions exceeding one hour to replenish lost minerals.
Fueling your body appropriately is equally vital. Consume a carbohydrate-rich snack or meal 1-2 hours before training to provide sustained energy. During longer rides, small, frequent intakes of easily digestible carbohydrates can help maintain blood sugar levels. Post-workout, prioritize protein intake to aid muscle recovery and repair. Avoid training under the influence of alcohol or other intoxicants.
Avoiding Overexertion and Injury
Prioritizing a proper warm-up is crucial before any bike manual trainer session; prepare your muscles for exertion. Gradually increase intensity, avoiding sudden spikes in effort. Listen to your body and recognize fatigue signals – pushing through pain can lead to injury. Ensure your bike is properly fitted and stable to prevent falls or strains.
Cool-down routines are equally important, aiding recovery and reducing muscle soreness. Don’t neglect strength training to build supporting muscles, enhancing cycling efficiency and minimizing injury risk. Remember, consistent practice, even in slick winter conditions, requires mindful pacing. Prioritize safety and avoid pushing beyond your limits.